WHERE LEGACY ENDS,
AUTOMATA BEGINS.
The fully integrated, AI-ready, lab automation platform.
Automata is overhauling how lab automation is done by demolishing legacy barriers, obliterating complexity, and supercharging discovery, driving a seismic shift that pulls tomorrow's labs into today's reality.
Software-defined LINQ is a holistic process orchestration platform enabling parallel workflow execution and real-time, in-depth analytics. With MCP-enabled connectivity, it connects LINQ to AI models.

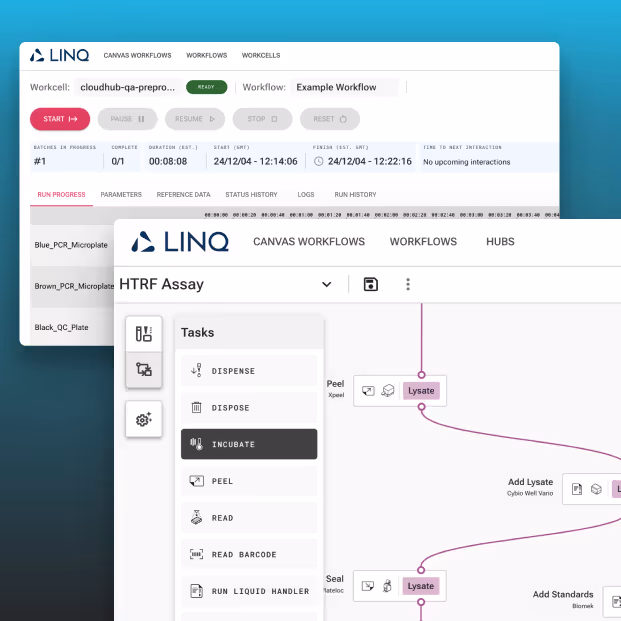
Design complex experiments with ease. LINQ’s node-based Canvas makes workflow building simple for all experience levels — no coding required.

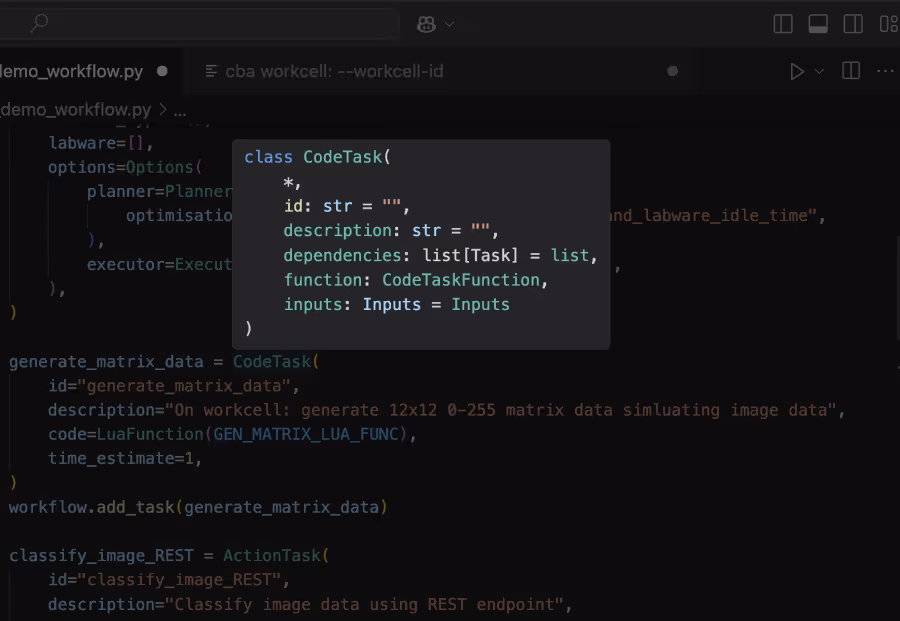
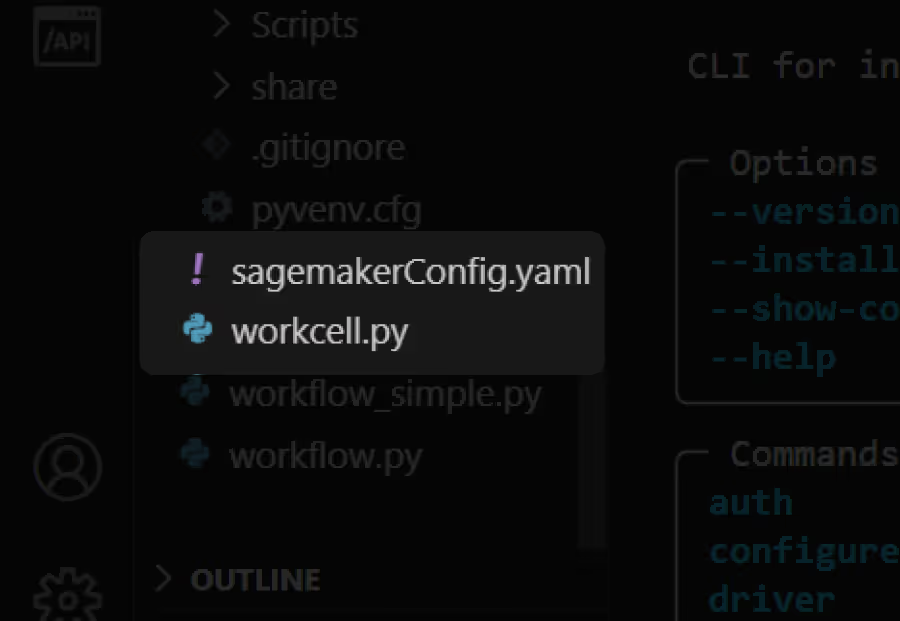
Control every step with LINQ's Python SDK — from setup to simulation on a digital workcell. Code, customize, and integrate with ease. Seamlessly interchangeable with LINQ Canvas.
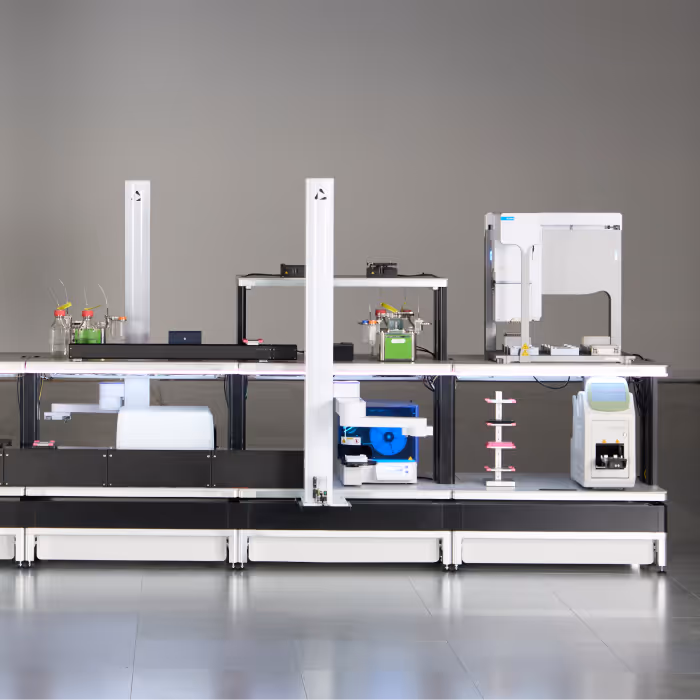
LINQ Bench scales with a lab's needs, offering over 800,000 customizable configurations to fit any instrument density and lab space requirements.
LINQ integrates with your lab’s software, data, and AI systems. It powers automated run management with real-time error handling.
Concurrent workflow execution and creation
LINQ’s cloud platform enables teams to build and test workflows as workcells process samples—driving efficiency. With remote access, tags, and runtime instructions, streamline collaboration and simplifiy handovers.

Deep version control
Select specfic engine and driver versions per workflow, sync with GitHub, and run legacy versions on the latest platform—ensuring updates without disruption or downtime.

Simplified collaboration
LINQ’s secure, browser-based access means teams can monitor and manage workflows from anywhere—streamlining remote collaboration and oversight.
Open integration
LINQ enables custom code steps for seamless integration with external systems via REST API, supporting in-workflow data processing and transformation. Integrating with a lab’s software stack, enabling advanced customization and lab-specific tools.

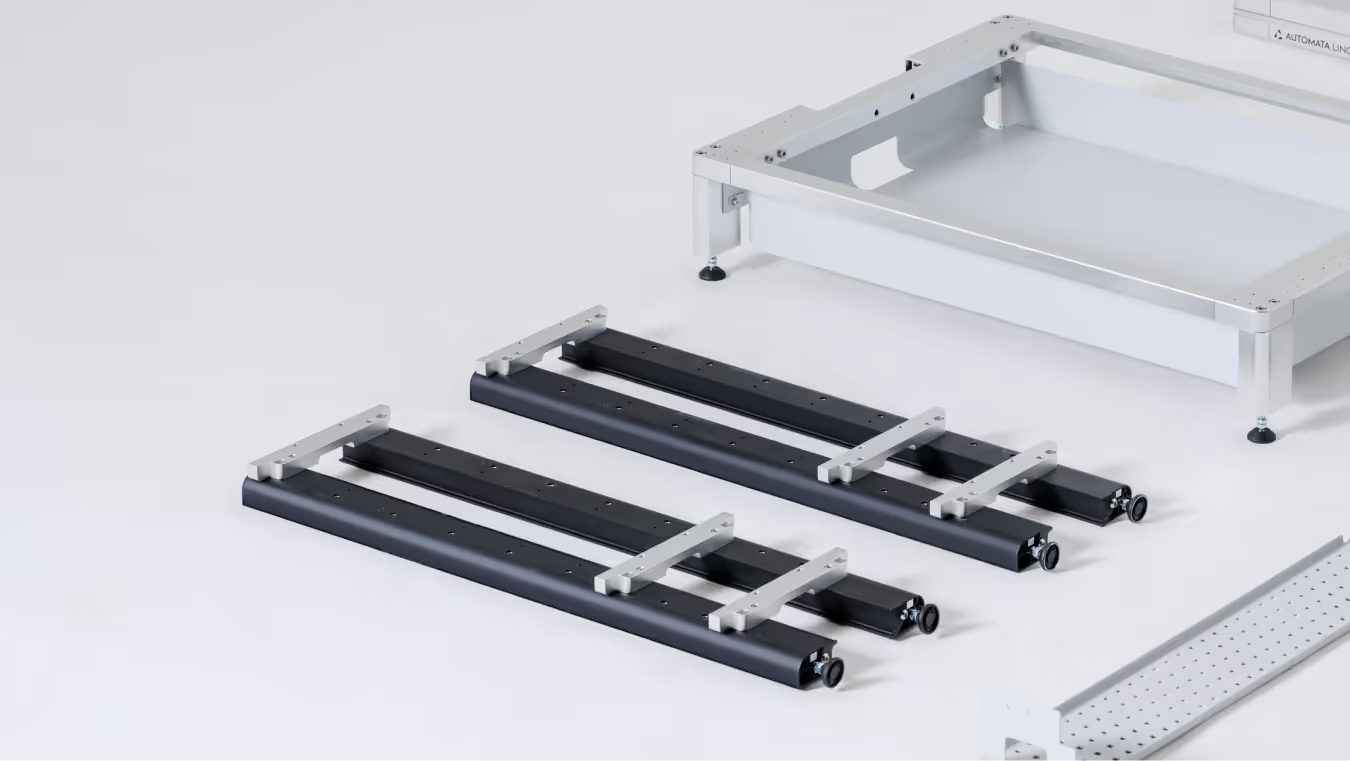
Configurable lab bench that supports any instrument
LINQ Bench can support any instrument and fit into any space with flexible, high-density configurations. Its dual-access design enables robot and staff access from either side, while Bridge and Maglev transport options optimize workflow with seamless connections and high-speed transfers.
Built for AI
LINQ integrates with your lab’s software, data, and AI systems, supporting custom tools and tailored workflows. It powers automated run management with real-time error handling and feeds rich, contextualized data into any system—laying the groundwork for fully automated, lights-off wet labs.

Built for scale
LINQ breaks free from rigid systems with adaptable workflows, seamless AI integration, and space-smart design—empowering labs to grow without limits.
LINQ Canvas - Software-defined workflows. Hybrid static and dynamic scheduling.
01
Define your workflow and Automation profiles
02
High Fidelity Simulation
03
Run Manager
04
Process Canvas
Dedicated customer success managers' guidance at every stage. Customer success, NOT customer support.
Trusted by our partners


Your lab's throughput multiplier
Your lab's time machine
